GPG: Setup GPG key for GitHub

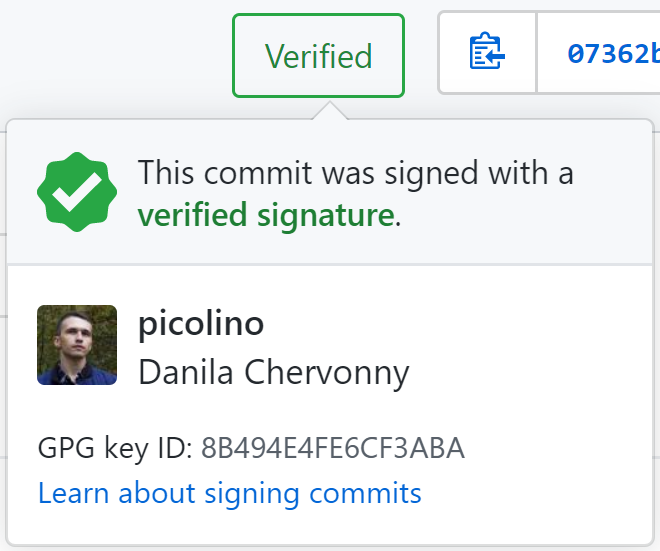
GitHub uses the GPG key to ensure user who committed into a repository is the same person.
GitHub marks such commits as verified so other people can trust that the changes in verified commit came from a trusted source.
This instruction is about how to set up a GPG key to making all commits into GitHub repository secured and verified.
Install GPG utilities
- Install GPG CLI.
-
Add GPG installation folder to
Pathenvironment variable. Use this in cmd launched by admin:1
setx /M path "%PATH%;C:/Program Files (x86)/gnupg/bin" -
Setup your git to use installed GPG CLI by using following command:
1
git config --global gpg.program "C:/Program Files (x86)/gnupg/bin/gpg.exe"
Create GPG key
-
Execute in command prompt
1
gpg --full-generate-key - Now you need to set up your GPG key settings, you can do it manually carefully selecting each parameter or just press Enter 3 times.
- Verify all of the key settings by typing
yand press Enter - Enter you real name, press Enter
- Enter your e-mail that is verified by GitHub, Enter
- Type a secure passphrase and store it, it’s required in the future.
Add GPG key to GitHub user account
-
Use the command below to list all of your GPG keys:
1
gpg --list-secret-keys --keyid-format LONG
-
Now you need to copy GPG key ID from the created key. In the example below key ID is
3AA5C34371567BD2:1 2 3 4 5 6
$ gpg --list-secret-keys --keyid-format LONG /Users/hubot/.gnupg/secring.gpg ------------------------------------ sec 4096R/3AA5C34371567BD2 2016-03-10 [expires: 2017-03-10] uid Hubot ssb 4096R/42B317FD4BA89E7A 2016-03-10
-
Now you need to export generated key in ASCII armor format:
1
gpg --armor --export 3AA5C34371567BD2
- Copy your GPG key, beginning with
-----BEGIN PGP PUBLIC KEY BLOCK-----and ending with-----END PGP PUBLIC KEY BLOCK-----. - Go to SSH and GPG keys settings → New GPG key → Paste the public key in ASCII armor format.
Setup Git using GPG key
Execute the following command to tell Git what GPG key need to use. Do not forget to replace 3AA5C34371567BD2 with your GPG key ID.
1
git config --global user.signingkey 3AA5C34371567BD2
This command tells Git to use GPG key for every commit for all local repositories on the current machine:
1
git config --global commit.gpgsign true
If you need to set up just one local repository just use this command in local repository directory:
1
git config commit.gpgsign true
Setup passphrase cache lifetime
After entering passphrase while first verified commit GPG automatically save it in the cache on 10 minutes. If you need to extend this time you need to set up gpg-agent. For example, if you want to set up entering passphrase every year (31536000 seconds):
- Go to
%appdata%/gnupg - Open/create
gpg-agent.conffile -
Update/add these values in it:
1
2
default-cache-ttl 31536000
max-cache-ttl 31536000
-
Reload agent:
1
gpgconf --reload gpg-agent
Note that you need to re-enter passphrase every time after machine restart. This behavior cannot be changed while you are using a passphrase.
First commit
When you commit any change into a local repository (configured to use gpgsign) you’ll see a passphrase confirmation dialog. You need to type here your secure passphrase generated before.
Done
Setup complete. Now all commits from the current machine will be secured and verified by gpg key.
Based on instructions from github